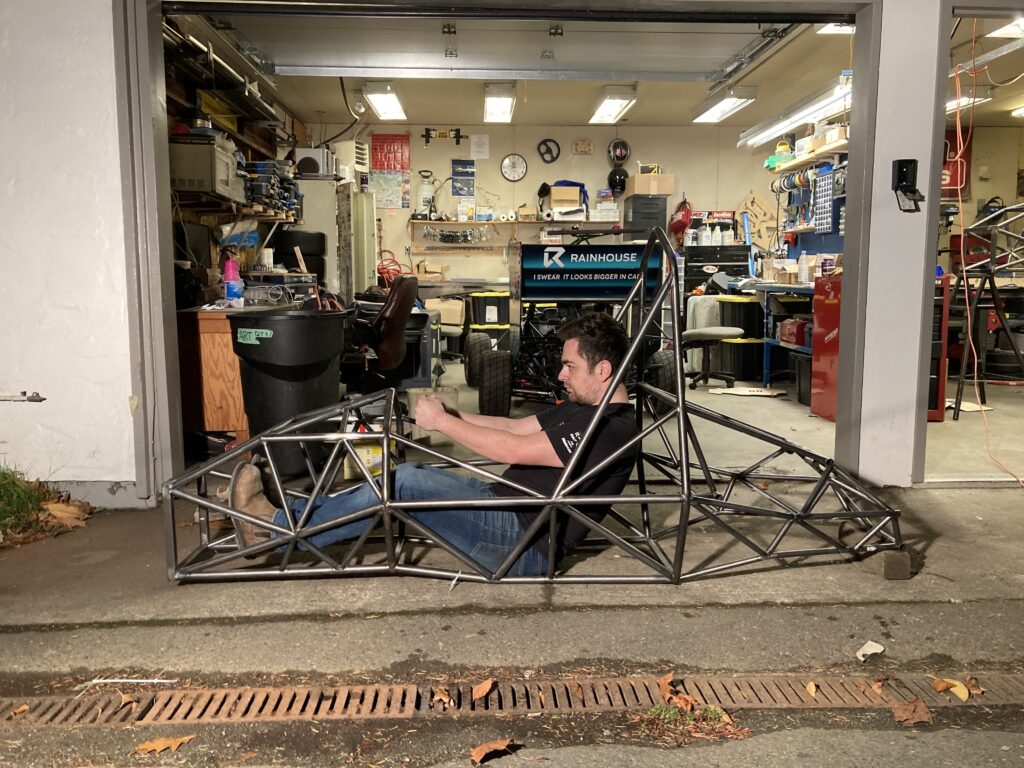
Formula SAE Chassis Design
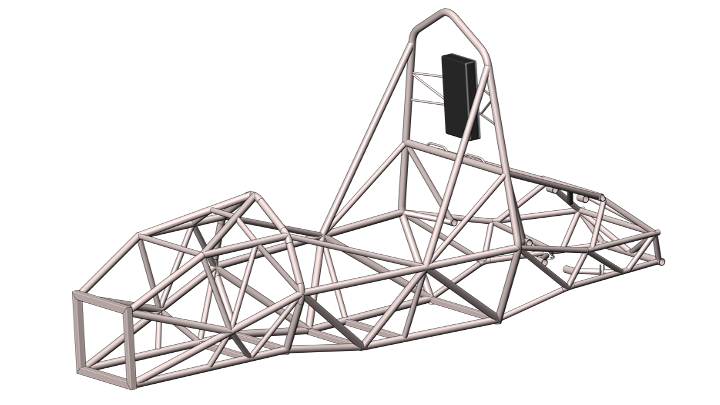
Requirements
- Pass FSAE Rules
- Integrate suspension, powertrain and driver
- Torsional rigidity > 2900Nm/deg
- Isolate cockpit, fuel system, and engine
- Manufacturing complete 2 months ahead of previous year’s schedule
Objectives
- Simplified, faster manufacucturing processes
- All suspension points +-1.5mm positition tolerance
- Torsional rigidity > 2900Nm/deg
- Mass < 30kg
- Faster access for critical powertrain servicing
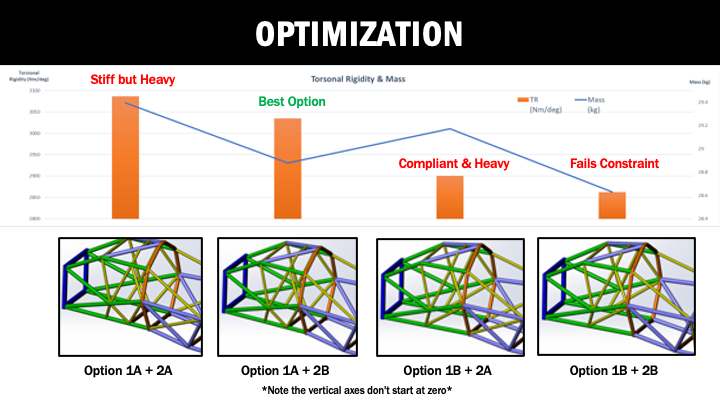
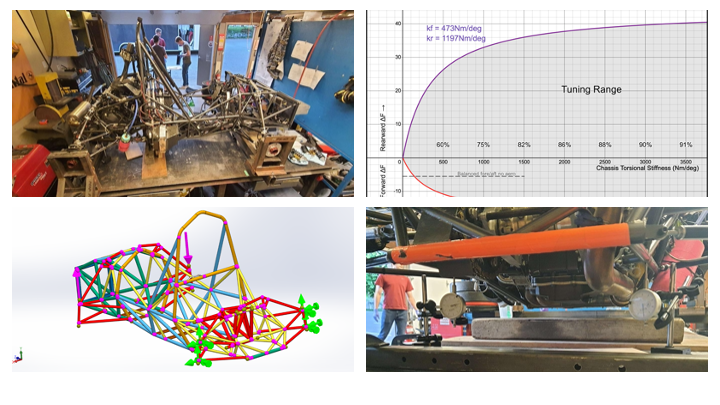
Solidworks Weldments and Beam Structure FEA was used to efficiently compare over 20 different design options and converge on a light, stiff design. Below is an excerpt from the design review presentation, showing a few of the options.
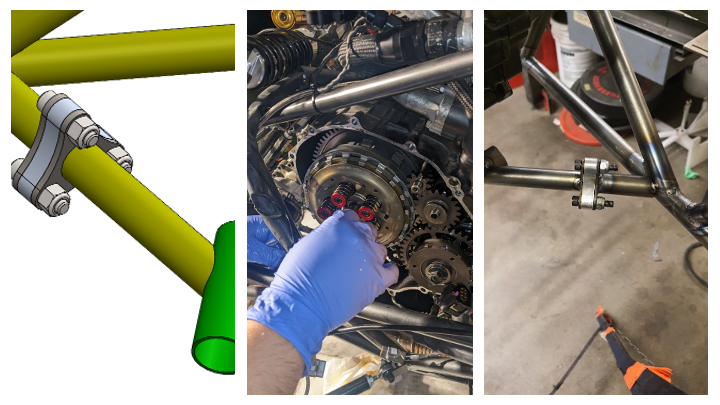
In the past, the engine had to be passed through the cockpit to be installed or removed. The intake, exhaust, and fuel systems had to be disassembled every time. With the detachable engine mounts, the engine is passed through the bottom of the engine compartment – both the intake and exhaust systems are left attached to the engine and the fuel system isn’t touched.
The photo in the middle shows a late night clutch repair happening the last night before we left for competition. Here, the engine didn’t even need to be removed because I designed an access/service point into the frame.
An important performance metric for a race car frame is the the torsional rigidity. This was estimated with Solidworks beam elements FEA and physically tested with a custom jig and dial indicators. The simulated value was 3034Nm/deg and the physical test was 3496Nm/deg – both surpassed the goal of 2900Nm/deg.
But how stiff is stiff enough? The reason for targeting torsional rigidity is to allow predictable cornering performance. The front and rear suspension roll stiffnesses will act together as springs in parallel, and will contribute to the lateral load transfer distribution (LLTD) on the wheels. If designed and tuned correctly, the vehicle will be well-balanced for steady-state cornering and the driver can get the most out of the vehicle. Adding a torsionally compliant chassis into the system creates a smaller LLTD tuning range and changes the tuning sensitivity.
The chart shown below shows how the tuning range grows asymtotically with torsional rigidity, and ‘% of if the chassis was perfectly rigid’ values are also shown. At 2900Nm/deg, it was found that our vehicle would have 90% of the ideal tuning range. The % size of the tuning range is also a good proxy for ‘is it ok for me to ignore chassis effects?’.
I recognized that the chassis manufacturing was by far the biggest bottleneck of the vehicle development process. Frame fitment issues in previous years would often cause over a month of unplanned delays. I made a point of improving the speed and precision of our processes, so that the rest of the team would have more time to assemble and troubleshoot their systems on the actual vehicle.
I generated 1:1 scale drawings of the major chassis bends, and used them to assess quality & accuracy once we received the frame tubes from our manufacturer. I kept track of all tasks for the entire chassis development process using our project management software ‘Monday.com’.
I sourced high-accuracy baltic birch 6mm plywood to build the welding jig. The entire jig relies on laser cut interference fit finger and slot joints. I performed test cuts before choosing this process, and found I could keep a 0.010″ positional tolerance per foot. This meant I could hold tolerances within 1/16″ across the wheelbase in the areas where it mattered (suspension points for example). I was able to jig the frame, engine, suspension and steering column using a single jig.
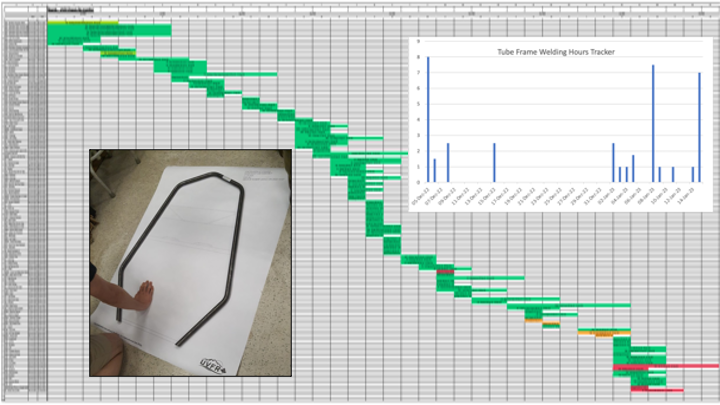
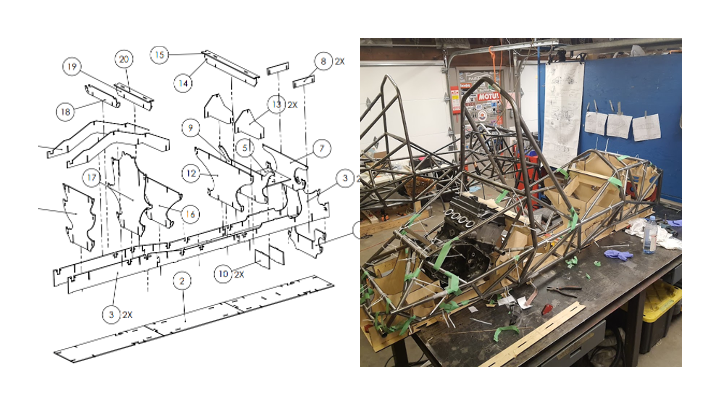
The frame ended up meeting all design requirements and objectives, and it scored near perfect points in the competition design presentation. Finishing early had a domino effect: other systems also moved their timelines up, and they had more time to install their assemblies on the car. We ended up having one of the best competition performances in our team’s 23 year history.
